Demonstrations that work the first time, and what each one teaches
A demonstration that works is worth an hour of explanation, and a demonstration that fails in front of twenty-eight children is worth about four minutes of apologising. The difference is mostly not luck. It is choosing demos with few moving parts, testing them once beforehand, and knowing exactly which idea you want the class to walk away with. What follows are demonstrations that hold up under classroom conditions, with the concept each one carries.
Quick answer
A good classroom demonstration is one that works every time, is visible from the back row, and carries a single idea a student can state afterwards. Reliability matters more than spectacle, because a demo that fails halfway teaches nothing except that science is fiddly. Choose demos with few variables, rehearse once before the lesson, and plan the question you will ask before the result rather than after it.
Key takeaways
- Rehearse a demo once alone before running it in front of the class.
- Visibility from the back row rules out most small-scale demos.
- Ask students to predict before the result, in writing, not by hands up.
- One concept per demonstration; two concepts means neither lands.
- Have a spare set of materials so a failure does not end the lesson.
What makes a demonstration classroom-proof
Most demonstrations that go wrong were fragile before they started. They needed a precise quantity, a specific brand of something, a temperature you cannot control, or three things to happen in the right order while you also watch the class. The demos that survive real conditions have few variables and forgiving margins.
- It works with approximate quantities rather than measured ones.
- It is visible from four metres away.
- It takes under three minutes from setup to result.
- Nothing in it is ruined by a student answering out of turn.
- You can repeat it immediately if the back row missed it.
Air and pressure
Air is the best subject for early demonstrations because students are convinced it is nothing. Anything that makes invisible air do visible work lands hard, and the concepts underneath it carry into later years.
The vortex cannon
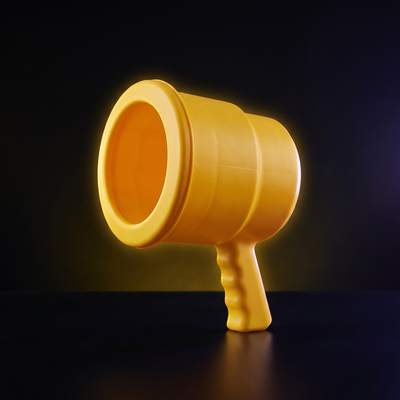
A cardboard box with a round hole cut in one face, a membrane across the back, and a sharp tap produces a spinning ring of air that travels across a room and knocks over a paper cup at the far end. Purpose-built versions such as the AirZooka do the same thing more consistently and with a range of roughly fifteen to twenty feet indoors, which matters if your room is long. The idea it teaches is that air is a substance with mass that can be pushed, and that a rotating ring holds together over distance in a way a puff of air does not.
Ask students to predict how far it will reach before the first shot, and mark the failed guesses on the floor with tape. Then ask why a ring travels and an open-handed push of air does not; the answer, that the rotation keeps the moving air separated from the still air around it, is a genuinely satisfying one for a nine-year-old.
The inverted glass of water
A glass filled to the brim, a card laid across the top, inverted over a tray. The card stays and the water does not fall. It teaches atmospheric pressure and it teaches it in four seconds. Fill it completely and use a stiff card; both failure modes come from ignoring those.
The collapsing can
A small amount of water heated in a drinks can, then inverted into cold water, crushes instantly. This one needs a heat source and proper supervision, but nothing else in the primary range produces the same reaction from a class. It teaches that reducing the pressure inside a container lets the outside air do the work.
| Demonstration | Concept | Setup |
|---|---|---|
| Vortex cannon | Air has mass; rotation holds a moving ring together | Low |
| Inverted glass and card | Atmospheric pressure pushes in every direction | Low |
| Collapsing can | Pressure difference across a container wall | High, needs heat |
| Density column | Liquids layer by density regardless of pouring order | Medium |
| Balloon and static | Charge attracts neutral objects | Low |
| Egg in a bottle | Air cooling reduces volume and pressure | Medium |
Demonstrations by concept and setup cost
Density and buoyancy
Density demonstrations are forgiving, which makes them good early ones, and they produce an image students remember for years.
- Density column: syrup, washing-up liquid, water, oil, poured into a tall clear jar. Layers form regardless of the order poured. Drop small objects in and let them settle at different levels.
- Sinking and floating oranges: one peeled, one not. The peel traps air, so the unpeeled one floats and the peeled one sinks, which is the opposite of every prediction the class makes.
- Raisins in fizzy water: bubbles attach, raisins rise, bubbles pop, raisins fall. It runs for ten minutes on its own at the front of the room.
- Salt water egg: an egg sinks in tap water and floats once enough salt is dissolved. Add the salt while they watch.
Heat, states, and change
These take longer but they are the ones that connect to the rest of the curriculum, and several can be set running at the start of a lesson and revisited at the end.
- Ice melting on metal and on wood, side by side. The metal one goes first, which students read as the metal being warmer. It is conducting heat away faster, and that distinction is worth the ten minutes.
- Colour diffusion in hot and cold water: two identical glasses, one drop of food colouring in each. The speed difference is obvious within a minute.
- Candle under a jar: the flame goes out and the water rises. Two concepts here, so pick one and ignore the other or neither will land.
- A bag of ice and salt around a sealed bag of cream, shaken, producing ice cream. Slow, memorable, and genuinely about freezing point.
Running the demonstration as a lesson, not a break
The risk with a good demonstration is that it becomes entertainment with a bit of science attached. The structure that prevents that is short and worth keeping the same every time, so the class knows what is expected of them before you touch anything.
- Show the equipment without explaining what will happen.
- Everyone writes one prediction, one line, no discussion.
- Run the demonstration. Repeat it once immediately.
- Collect observations only, not explanations. What did you see, not why.
- Then name the concept and connect it back to the predictions that were wrong.
Safety and the honest limits
Anything involving heat, glass, or a sealed container needs your school's own risk assessment rather than a list on a webpage, and some of the demos above should be teacher-only for that reason. It is also worth being honest with a class about what a demonstration does and does not prove. Showing a result once is not evidence in the way a controlled test is, and saying so out loud teaches something more durable than any single demo on this page.
Rehearse it once alone. The demo that fails in front of a class almost always failed in a way you would have caught.