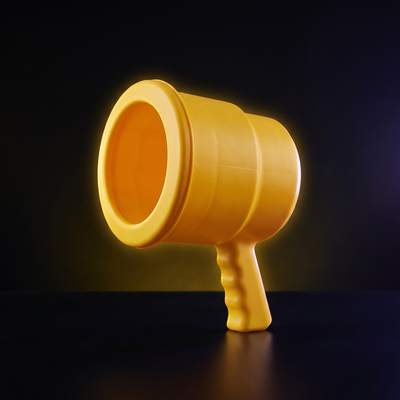
How to See Air Rings
Air rings are easy to feel and hard to watch. Fire one across a room and someone at the far end will notice the puff, but nobody sees the doughnut of spinning air that delivered it. Making it visible is a matter of loading the ring with something that scatters light, then setting up the room so that scattering shows. Both parts matter, and most people get the second one wrong.
Quick answer
An air ring is invisible because clear air scatters almost no light, so you make it visible by loading the ring with something that does: fog-machine haze, cool mist from a humidifier, or steam from a kettle held at a safe distance. Fill the launcher's chamber with the marker, fire against a dark background with a light source from the side, and the ring shows up clearly. Never burn incense, paper or anything else indoors to produce visible smoke.
Key takeaways
- You are not making a different ring — only adding particles that scatter light.
- A water-based fog machine gives the densest, longest-lasting result.
- A cool-mist humidifier is the safest option around children.
- Side lighting against a dark background makes far more difference than fog density.
- Do not burn anything indoors to create smoke; it is a fire and air-quality risk, not a science technique.
Why the ring is invisible in the first place
You see things because light bounces off them. Clean air is almost perfectly transparent: light passes through it with barely any scattering, so a moving parcel of air looks exactly like the still air around it. The ring is fully there and carrying real momentum — it simply has nothing in it for light to reflect from.
Adding fog or mist puts millions of tiny droplets inside the ring. Those droplets scatter light in all directions, and because the ring's rotation keeps them bundled together rather than dispersing, the shape becomes visible for as long as the ring holds together.
Method 1: a water-based fog machine
This gives the densest and most photogenic result. A small party fog machine is enough; the large ones made for venues will flood a domestic room.
- Run the machine briefly and let the fog settle for a moment so it is even rather than billowing.
- Hold the launcher's opening in the fog and let the chamber fill — or fire a couple of empty shots to draw fog in.
- Fire across the room. The ring should be clearly visible for most of its travel.
- Ventilate afterwards and do not run the machine continuously in a closed room.
Method 2: a cool-mist humidifier
An ultrasonic humidifier produces a stream of cool water droplets that make an excellent marker. This is the option to choose when children are running the experiment themselves: there is no heat, no fluid to handle, and nothing to switch off in a hurry.
Point the outlet into the chamber for a few seconds, then fire immediately — cool mist is less persistent than fog fluid and drifts out of an open chamber quickly. Rings from a humidifier read as a soft white doughnut rather than a sharp one, which is fine for watching and a little harder to photograph.
Method 3: steam
Steam from a kettle works, with the obvious caveat that it is hot. Keep the kettle on a stable surface, let the plume rise and cool slightly before scooping it up, and keep children away from the spout entirely. Steam condenses and disperses fast, so this method gives the shortest visible flight of the three.
| Method | Visibility | Safety around children | Clean-up |
|---|---|---|---|
| Fog machine | Best; sharp, dense rings | Adult-operated; ventilate after | Slight residue on surfaces |
| Cool-mist humidifier | Good; soft white rings | Best; no heat, no fluid handling | None |
| Kettle steam | Fair; disperses quickly | Hot water and spout risk | None |
| Powders | Good but messy | Not advised; inhalation | Settles over everything |
Comparing the three markers
Lighting, which matters more than the fog
Most disappointing attempts are lighting failures, not fog failures. Room lights overhead wash the ring out; what you want is light crossing the ring's path from the side, and darkness behind it.
- Hang a dark sheet or close a dark curtain along the far wall.
- Put a single strong light — a torch, a work light, a phone light — to one side, roughly level with the ring's path.
- Turn the overhead lights off, or as low as the room allows.
- Stand so you are looking across the beam, not into it.
A narrow beam works particularly well. If the light picks out a slice of the room rather than the whole of it, the ring flashes brightly as it passes through and the effect is far more striking than even lighting.
Photographing and filming rings
Rings from a hand-sized launcher cross a room in well under a second, so ordinary video misses most of the flight. Use a phone's slow-motion mode, which is where this activity gets genuinely interesting: at high frame rates you can watch the ring form at the rim, wobble, widen and finally break apart.
- Shoot at the highest frame rate the phone offers.
- Fix the phone on a stand rather than holding it — handheld footage of a fast, dim subject is unusable.
- Frame the whole flight path rather than trying to follow the ring.
- Lock exposure and focus on the middle of the path before firing.
Getting a cleaner ring
Once the ring is visible, its flaws become visible too. Wobbly, short-lived rings usually come from an uneven push or a rough opening. A single sharp pulse produces a better ring than a hard slow shove, a smooth circular rim beats a ragged one, and still air beats a room with a door open. Launchers built for the job, such as the AirZooka, use a stretched diaphragm precisely because it delivers the same sharp push every time.
Fire single shots with a pause between them. A second ring launched into the disturbed air left by the first will usually distort or collapse early — interesting to watch on slow motion, but not what you want when you are trying to demonstrate a clean one.